Sketchware AdMob Settings
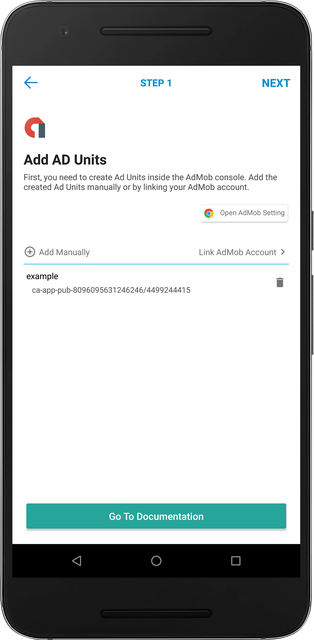
After you create Ad Units, you need to link them inside your Sketchware project.
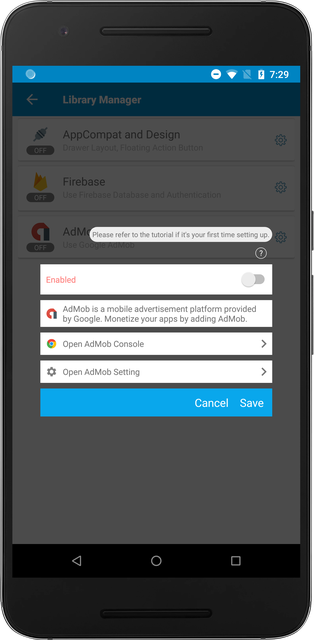
Navigate to AdMob Settings
Inside your project, navigate to AdMob library settings under the Library Manager.
Then, click on the Open AdMob Settings button.
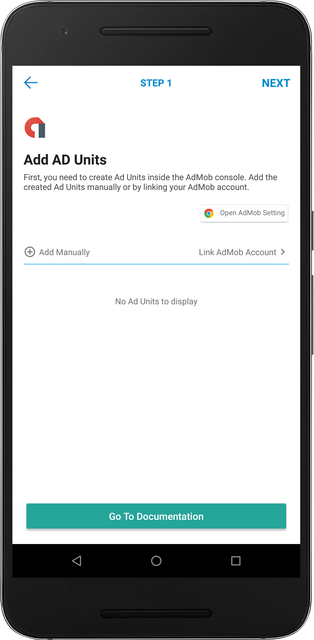
You can either add the Ad Units manually, or by linking your AdMob account.
Note that Add Manually does NOT create a new Ad Unit for you. You need to create Ad Units inside the AdMob console.
After you linked the Ad Units, click on NEXT.
You need to determine which Ad Unit is going to be used for Banner Ad and Interstitial Ad. Banner Ad Unit ID should be used for Banner Ads, and Interstitial Ad Unit ID should be used for Interstitial Ads.
After you assign the IDs accordingly, click NEXT.

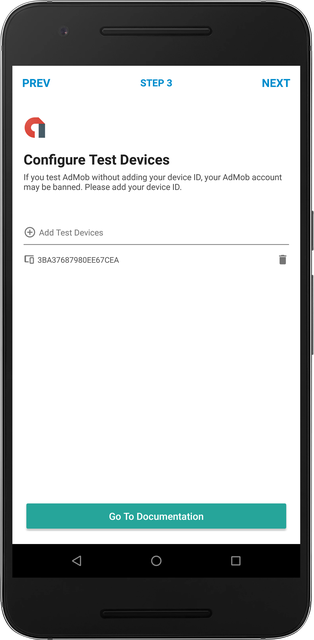
This step is important. You need to add your test devices as a test device, or your AdMob account may result in a ban.
After you add your device ID, click NEXT.
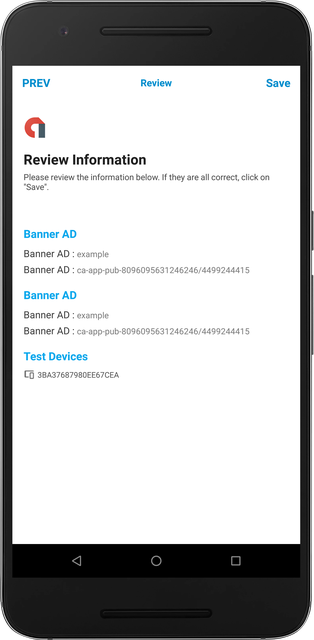
Please review the information and click on SAVE.